ここでは画像をマウスオーバーしたときのスタイルシート効果サンプルを思いつく限り紹介していきます。
コンテンツ
マウスオーバーで画像を拡大する
ボタンで表示を切り替えてご覧ください。
See the Pen css_mouseover_img01 by kenichi (@ken81) on CodePen.
<div class="img_wrap">
  <img src="https://cotodama.co/wp-content/uploads/2018/09/css_mouseover_img03.png">
</div>
.img_wrap{
  border: 1px solid #ddd;
  width: 300px;
  height: 226px;
  margin: 0 auto;
  overflow: hidden;
  cursor: pointer;
}
.img_wrap img{
  width: 100%;
  transition-duration: 0.5s;
}
.img_wrap:hover img{
  transform: scale(1.2);
  transition-duration: 0.5s;
}
ポイントは、画像が拡大したときに要素の外にはみ出さないようoverflow:hidden;を指定ところです。
マウスオーバーで画像を明るくする
See the Pen css_mouseover_img02 by kenichi (@ken81) on CodePen.
<div class="img_wrap">
  <img src="https://cotodama.co/wp-content/uploads/2018/09/css_mouseover_img03.png">
</div>
.img_wrap{
  border: 1px solid #ddd;
  width: 300px;
  height: 226px;
  margin: 0 auto;
  overflow: hidden;
}
.img_wrap img{
  width: 100%;
  cursor: pointer;
  transition-duration: 0.3s;
}
.img_wrap:hover img{
  opacity: 0.6;
  transition-duration: 0.3s;
}
見た目は、画像が明るくなったように見えますが、実際には画像を透明にして背景を透かせているだけです。そのため、背景が白くないときはこうはなりません。
マウスオーバーで画像を暗くする
See the Pen css_mouseover_img03 by kenichi (@ken81) on CodePen.
<div class="img_wrap">
  <img src="https://cotodama.co/wp-content/uploads/2018/09/css_mouseover_img03.png">
</div>
.img_wrap{
  border: 1px solid #ddd;
  width: 300px;
  height: 226px;
  margin: 0 auto;
  overflow: hidden;
  background: #000;
}
.img_wrap img{
  width: 100%;
  cursor: pointer;
  transition-duration: 0.3s;
}
.img_wrap:hover img{
  opacity: 0.6;
  transition-duration: 0.3s;
}
先ほどの画像を明るくするものに背景色background: #000;を入れただけです。
マウスオーバーで画像を少し傾けながら拡大する
See the Pen css_mouseover_img04 by kenichi (@ken81) on CodePen.
<div class="img_wrap">
  <img src="https://cotodama.co/wp-content/uploads/2018/09/css_mouseover_img03.png">
</div>
.img_wrap{
  border: 1px solid #ddd;
  width: 300px;
  height: 226px;
  margin: 0 auto;
  overflow: hidden;
}
.img_wrap img{
  width: 100%;
  cursor: pointer;
  transition-duration: 0.5s;
}
.img_wrap img:hover{
  transform: scale(1.2) rotate(9deg);
  transition-duration: 0.5s;
}
transform: scale(1.2) rotate(9deg);の部分で拡大と角度の指定をしています。
マウスオーバーで要素を浮かせる
See the Pen css_mouseover_img05 by kenichi (@ken81) on CodePen.
<div class="img_wrap">
  <img src="https://cotodama.co/wp-content/uploads/2018/09/css_mouseover_img03.png">
</div>
.img_wrap{
  border: 1px solid #ddd;
  width: 300px;
  height: 226px;
  margin: 20px auto 0;
  transition-duration: 0.5s;
}
.img_wrap img{
  width: 100%;
  cursor: pointer;
}
.img_wrap:hover{
  box-shadow: 10px 10px 10px rgba(0,0,0,0.5);
  transform: translateY(-10px);
  transition-duration: 0.5s;
}
box-shadow: 10px 10px 10px rgba(0,0,0,0.5);で影を付けて、同時にtransform: translateY(-10px);で要素を上に移動させています。
マウスオーバーで画像のぼかしを消す
See the Pen css_mouseover_img06 by kenichi (@ken81) on CodePen.
<div class="img_wrap">
  <img src="https://cotodama.co/wp-content/uploads/2018/09/css_mouseover_img03.png">
</div>
.img_wrap{
  border: 1px solid #ddd;
  width: 300px;
  height: 226px;
  margin: 0 auto;
  overflow: hidden;
}
.img_wrap img{
  width: 100%;
  transform: scale(1.1);
  cursor: pointer;
  filter: blur(5px);
  transition-duration: 0.5s;
}
.img_wrap img:hover{
  filter: blur(0);
  transition-duration: 0.5s;
}
filter: blur(5px);がぼかしの設定です。
マウスオーバーでモノクロからカラーに
See the Pen css_mouseover_img07 by kenichi (@ken81) on CodePen.
<div class="img_wrap">
  <img src="https://cotodama.co/wp-content/uploads/2018/09/css_mouseover_img03.png">
</div>
CSS
.img_wrap{
  border: 1px solid #ddd;
  width: 300px;
  height: 226px;
  margin: 0 auto;
  overflow: hidden;
}
.img_wrap img{
  width: 100%;
  transform: scale(1.1);
  cursor: pointer;
  filter: grayscale(100%);
  transition-duration: 0.5s;
}
.img_wrap img:hover{
  filter: grayscale(0);
  transition-duration: 0.5s;
}
filter: grayscale(100%);を指定すると画像がモノクロになります。
マウスオーバーで丸い画像を正方形に
See the Pen css_mouseover_img08 by kenichi (@ken81) on CodePen.
<div class="img_wrap">
  <img src="https://cotodama.co/wp-content/uploads/2018/09/css_mouseover_img04.png">
</div>
body{
  background: #daeffd;
}
.img_wrap{
  width: 250px;
  height: 250px;
  margin: 0 auto;
  overflow: hidden;
}
.img_wrap img{
  width: 100%;
  cursor: pointer;
  border-radius: 50%;
  transition-duration: 0.3s;
}
.img_wrap img:hover{
  border-radius: 0;
  transition-duration: 0.3s;
}
正方形の要素にborder-radius: 50%;を指定すると丸くできます。
マウスオーバーで画像が回転する
See the Pen css_mouseover_img11 by kenichi (@ken81) on CodePen.
<div class="img_wrap">
  <img src="https://cotodama.co/wp-content/uploads/2018/09/css_mouseover_img04.png">
</div>
body{
  background: #daeffd;
}
.img_wrap{
  width: 250px;
  height: 250px;
  margin: 0 auto;
  overflow: hidden;
  border-radius: 50%;
}
.img_wrap img{
  width: 100%;
  cursor: pointer;
  transition-duration: 0.5s;
}
.img_wrap img:hover{
  transform: rotate(360deg);
  transition-duration: 0.5s;
}
transform: rotate(360deg);で画像を回転させています。
マウスオーバーでヨコに回転する
See the Pen css_mouseover_img09 by kenichi (@ken81) on CodePen.
<div class="img_wrap">
  <img src="https://cotodama.co/wp-content/uploads/2018/09/css_mouseover_img03.png">
</div>
.img_wrap{
  width: 300px;
  height: 226px;
  margin: 0 auto;
  overflow: hidden;
}
.img_wrap img{
  width: 100%;
  cursor: pointer;
  transition-duration: 0.5s;
}
.img_wrap:hover img{
  transform: rotateY( 360deg );
  transition-duration: 0.5s;
}
transform: rotateY( 360deg );でヨコに回転させています。
マウスオーバーでタテに回転する
See the Pen css_mouseover_img10 by kenichi (@ken81) on CodePen.
<div class="img_wrap">
  <img src="https://cotodama.co/wp-content/uploads/2018/09/css_mouseover_img03.png">
</div>
.img_wrap{
  width: 300px;
  height: 226px;
  margin: 0 auto;
  overflow: hidden;
}
.img_wrap img{
  width: 100%;
  cursor: pointer;
  transition-duration: 0.5s;
}
.img_wrap:hover img{
  transform: rotateX( 360deg );
  transition-duration: 0.5s;
}
transform: rotateX( 360deg );でタテに回転させています。
マウスオーバーで画像が動き出す
See the Pen css_mouseover_img06 by kenichi (@ken81) on CodePen.
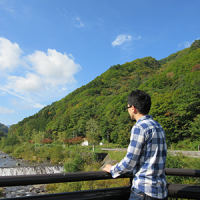
<div class="img_wrap">
  <img src="https://cotodama.co/wp-content/uploads/2018/09/css_mouseover_img01.png">
</div>
.img_wrap{
  border: 1px solid #ddd;
  width: 300px;
  height: 169px;
  margin: 0 auto;
  overflow: hidden;
  cursor: pointer;
}
.img_wrap img{
  width: 100%;
}
.img_wrap:hover{
  background: url(https://cotodama.co/wp-content/uploads/2018/09/css_mouseover_img02.gif) 0 0 / 100% no-repeat;
}
.img_wrap:hover img{
  display: none;
}
マウスオーバー時に、画像をdisplay: none;で非表示にして、代わりにbackgroundで背景画像としてgif動画を表示させています。この方法だと2回目以降にマウスオーバーしたときに動画が途中から再生されてしまう場合があります。どんなタイミングでマウスオーバーしてもgif動画が最初から再生されるようにするには、jQueryを使った方が良いでしょう。
以上がマウスオーバーで画像に効果を入れる方法でした。